
How to: Perfectly Smooth Frosting
If cakes were people and people were cakes, I think I'd probably be a blueberry cheesecake because, well, they're sweet and fruity and usually a little cold and also it's Matt's favorite cake variant so let's just stick with that. I think Matt would probably be a fruit cake because he's also fruity but much more dense than me, but don't tell him I said that. And Fox would still be Fox because in this scenario only cakes are human and humans are cakes and I didn't really picture Fox being anything but a furry little puppy.
What kind of cake would you be, friends?
Please say funfetti.
So today we'll be talking about making cakes pretty. Fun fact: once when I was a wee little gay boy, I found myself in a cake decorating class at the local Michael's, where I was in the company of my favorite people, moms. It was literally me and like twenty moms it was actually SO WEIRD but I survived and now am obviously an expert in decorating cakes, so I've brought my skills to share with you on this here little glitter-dusted nook of the food web.
So, class, today we're talking about making cakes that are perfectly smooth, or at least somewhat mostly kind of smooth. I'm a real big fan of rustic cakes that don't require much decorating work, but sometimes you really want to turn up the fancy factor and be like "yes girl look at this Stepford wife of a cake - she's got not a wrinkle in sight and is maybe soul-less but so so beautiful" and I'm here to help you do it.
First, I should probably definitely note that this is not a cake or icing recipe, if you want one of those, we got em! Basically you'll want to just follow the instructions for your cake recipe up until you've got baked and cooled cake layers, and then you can follow the icing steps below.
Some Cake Recipes:
Cardamom Carrot Cake (GF) with Earl Grey Frosting
Wine + Coffee Cake with Port Wine Frosting
Chocolate Chip Grand Marnier Cake with Goat Cheese Buttercream

Okie doke so first things first, for most very special results, you're going to want to freeze your cake layers. I know you're maybe dismissing this because that sounds like it will ruin the texure and flavor of the cake, but here's a lil tiny secret: I make all of my cakes ahead of time and freeze them and they never ever lose their delicious flavor or crumb. The reason we're doing this is because frozen cake layers are sturdier and easier to decorate, and because the cold temperature allows for us to create a much smoother layer of icing. We'll go into it more in a moment, but basically we're going to be using a heated spatula to spread our icing, and when that heated spatula comes in contact with the cold cake, the icing melts rapidly and then firms up again within a few moments, giving you a gorgeous and smooth sheen.
To freeze your layers, just tightly wrap each layer individually in plastic wrap before stacking them on a tray or plate and sticking them in the freezer for 4 hours to 1 month.
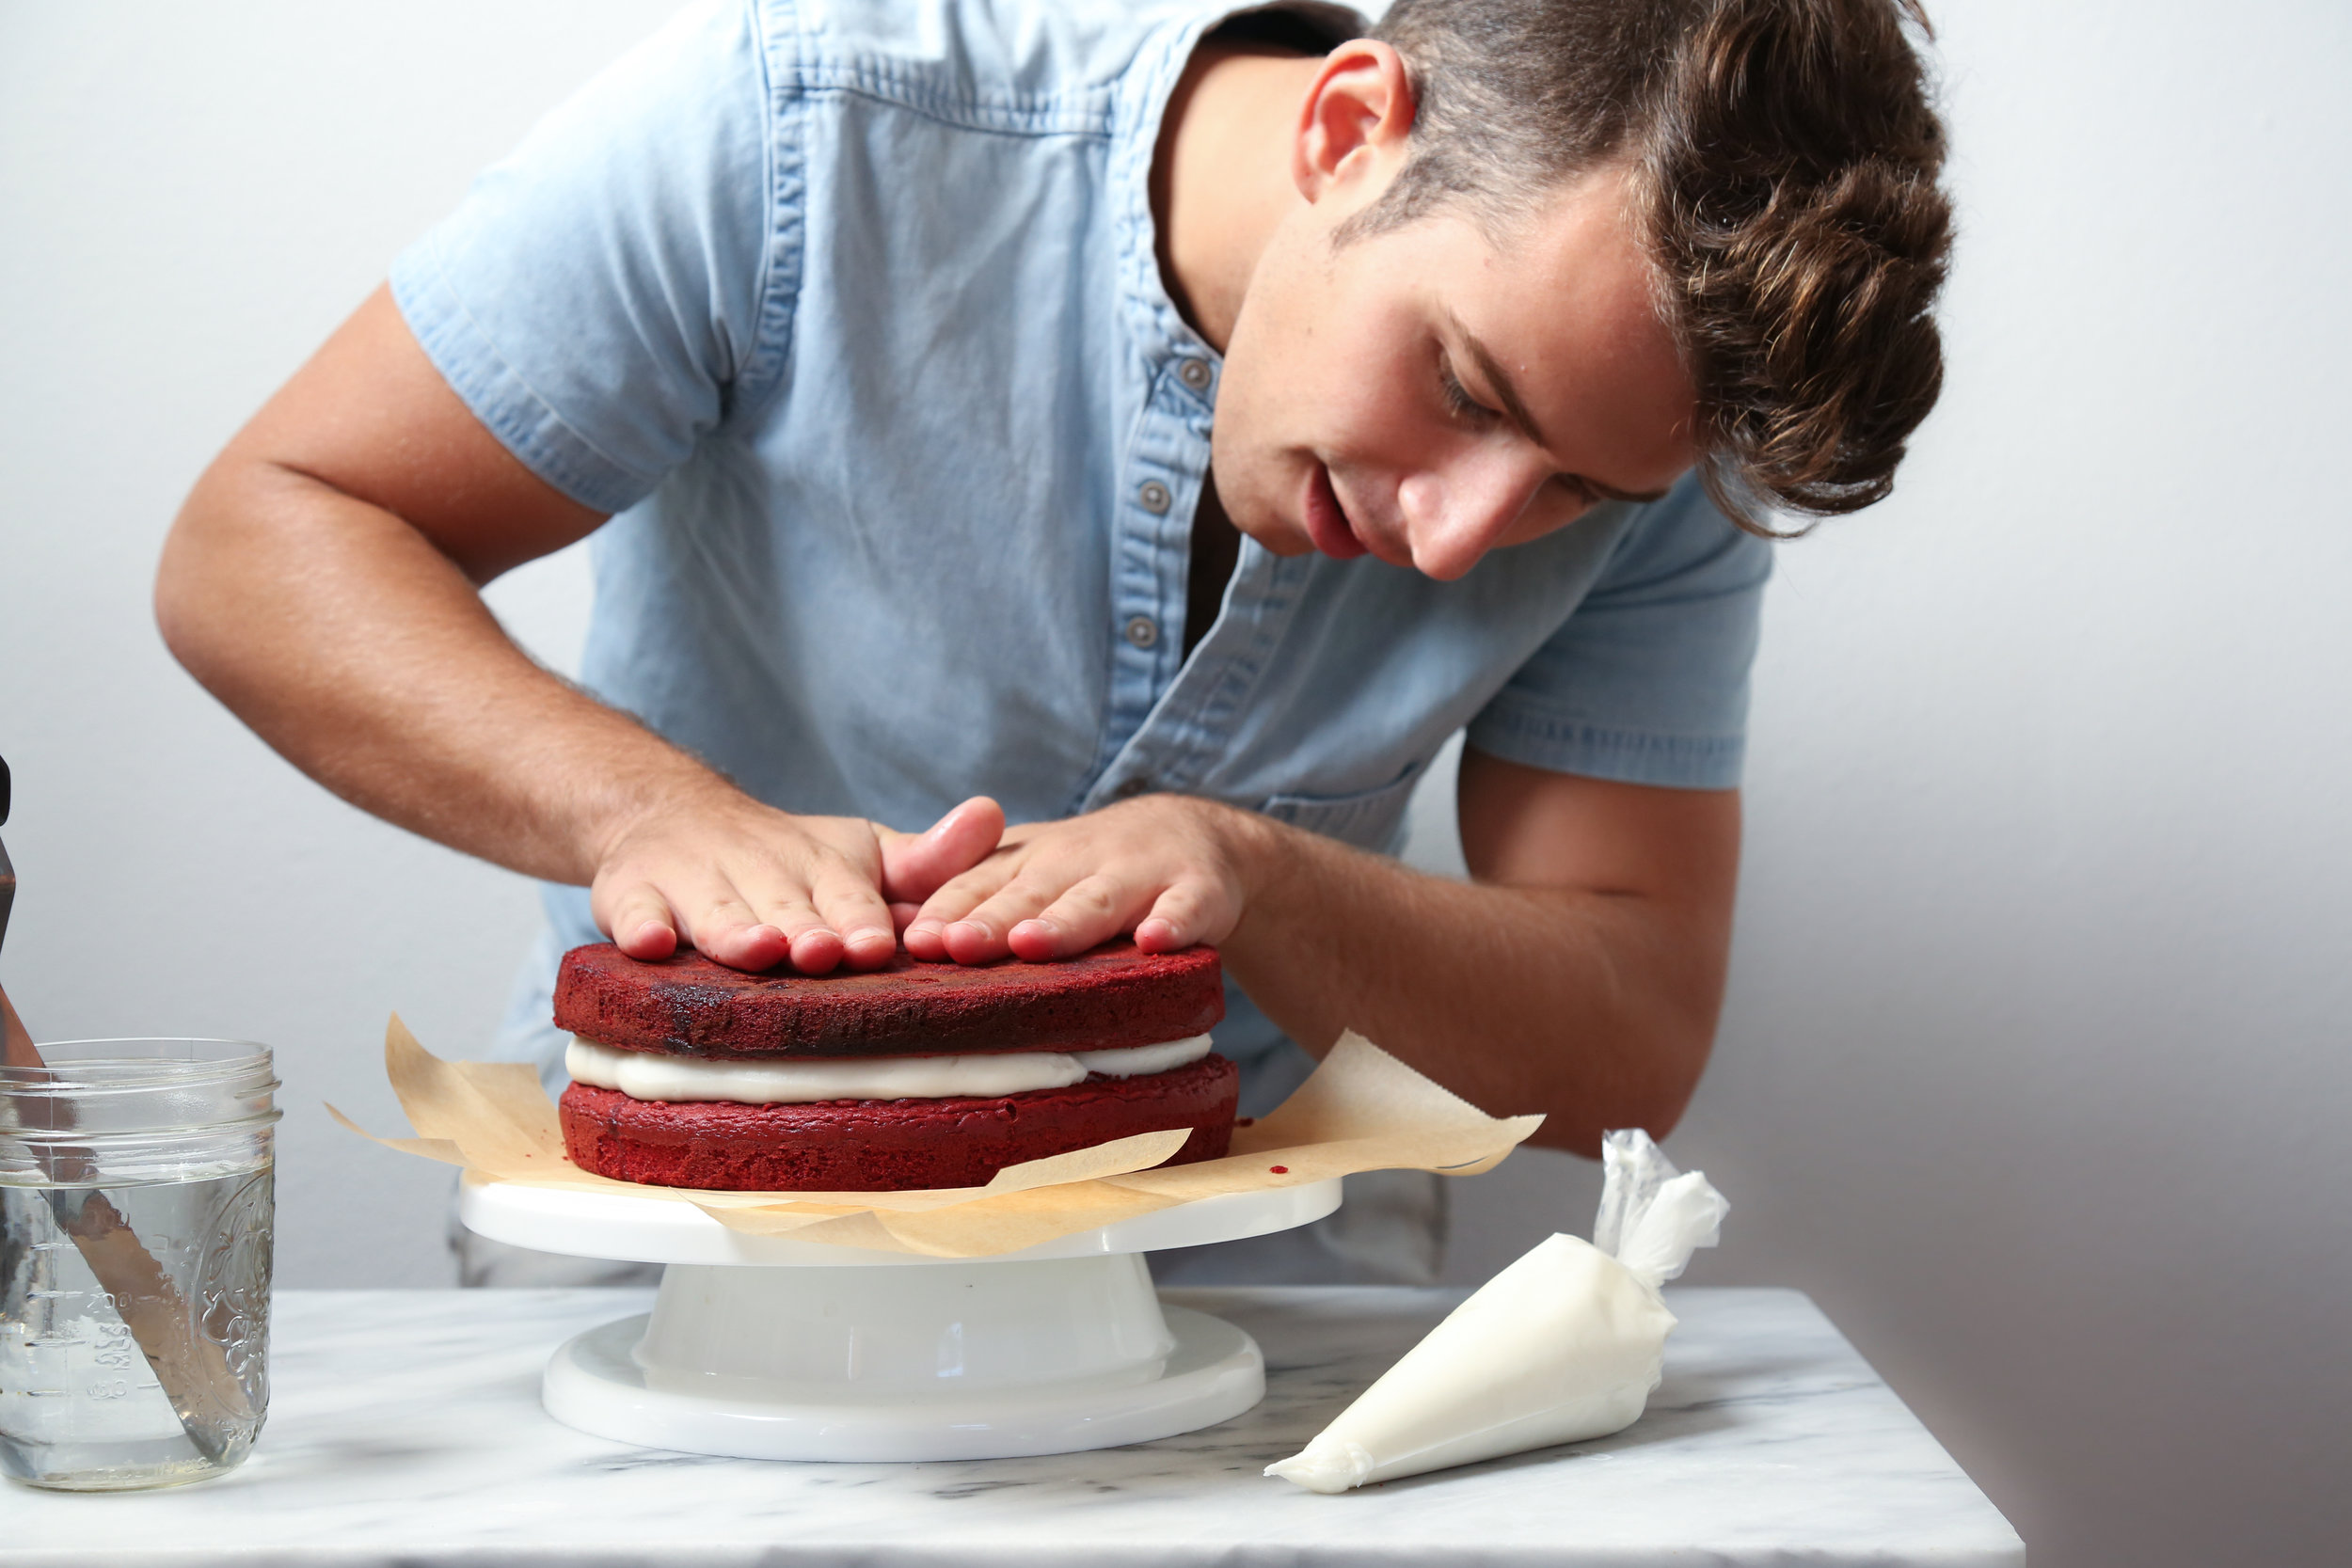
Once we're ready to decorate our beautiful frozen cake baby, prepare a decorating stand (we use a rotating decorating stand that is God's gift to bakers) by placing four thin strips of parchment around the edges of where the cake will go. You will then remove the cake from the freezer and place it so that all of the edges of parchment paper are partially underneath the layer of cake (see photos above and below). These will remain here until the last few steps, when we'll slide the paper out and reveal a totally clean and icing smudge-free cake stand.

Next, go ahead and stuff your biggest piping bag (or Ziploc bag, really) with a bunch of icing and, starting from the edge of the first layer and working inward, pipe icing into the center in an even layer. I go in a circular motion, basically making what looks like the cross-section of a rolled up yoga mat.
Add your next layer and, if this is only your second-to-last layer, repeat the process above, but if this is only a two layer cake and this is your last layer, move on to the step below


Now we're ready to do our crumb coat!! This coat is very thin and goes on before your final coat, ensuring that all of our little crumb friends stay where they belong and don't make any appearances on the outside of the finished cake.
On top of your stacked and filled cake, add a big ole heaping plop of icing and, holding your cake stand firmly in place, use your offset spatula to create a very thin layer of icing around first the top of the cake, before ushering it towards the sides and bottom. Below is a picture of what the crumb coat should look like!

Now that our cake has been coated in an appropriately small amount of icing love, we're going to toss her back in the freezer for about half an hour to make sure that our crumb coat is very very firm.

Remove our cake friend from the freezer and plop a whole lot of icing on the very top of the cake. You're going to probably want to put all of your remaining icing up there.
Now here's where our magic heated spatula trick comes to play. We're gonna heat up a jar or mug of water until it is really very very super hot. Place your offset spatula into the water and let it sit for about 30 seconds, until it too is really very very super hot. Next, remove the spatula from the water, use a clean towel to wipe off the water and any excess icing that may be sticking around, and use the spatula to spread the plop of icing from the center of the top of the cake, to the edges, going in a slow, gentle motion. Once you reach the edge of the cake, work the icing down the sides, using the same gentle movement to spread the icing love all over the cake from top to bottom. You will want to repeat the process of heating (and drying) your spatula throughout this process, ensuring the spatula stays warm to the touch for best results.
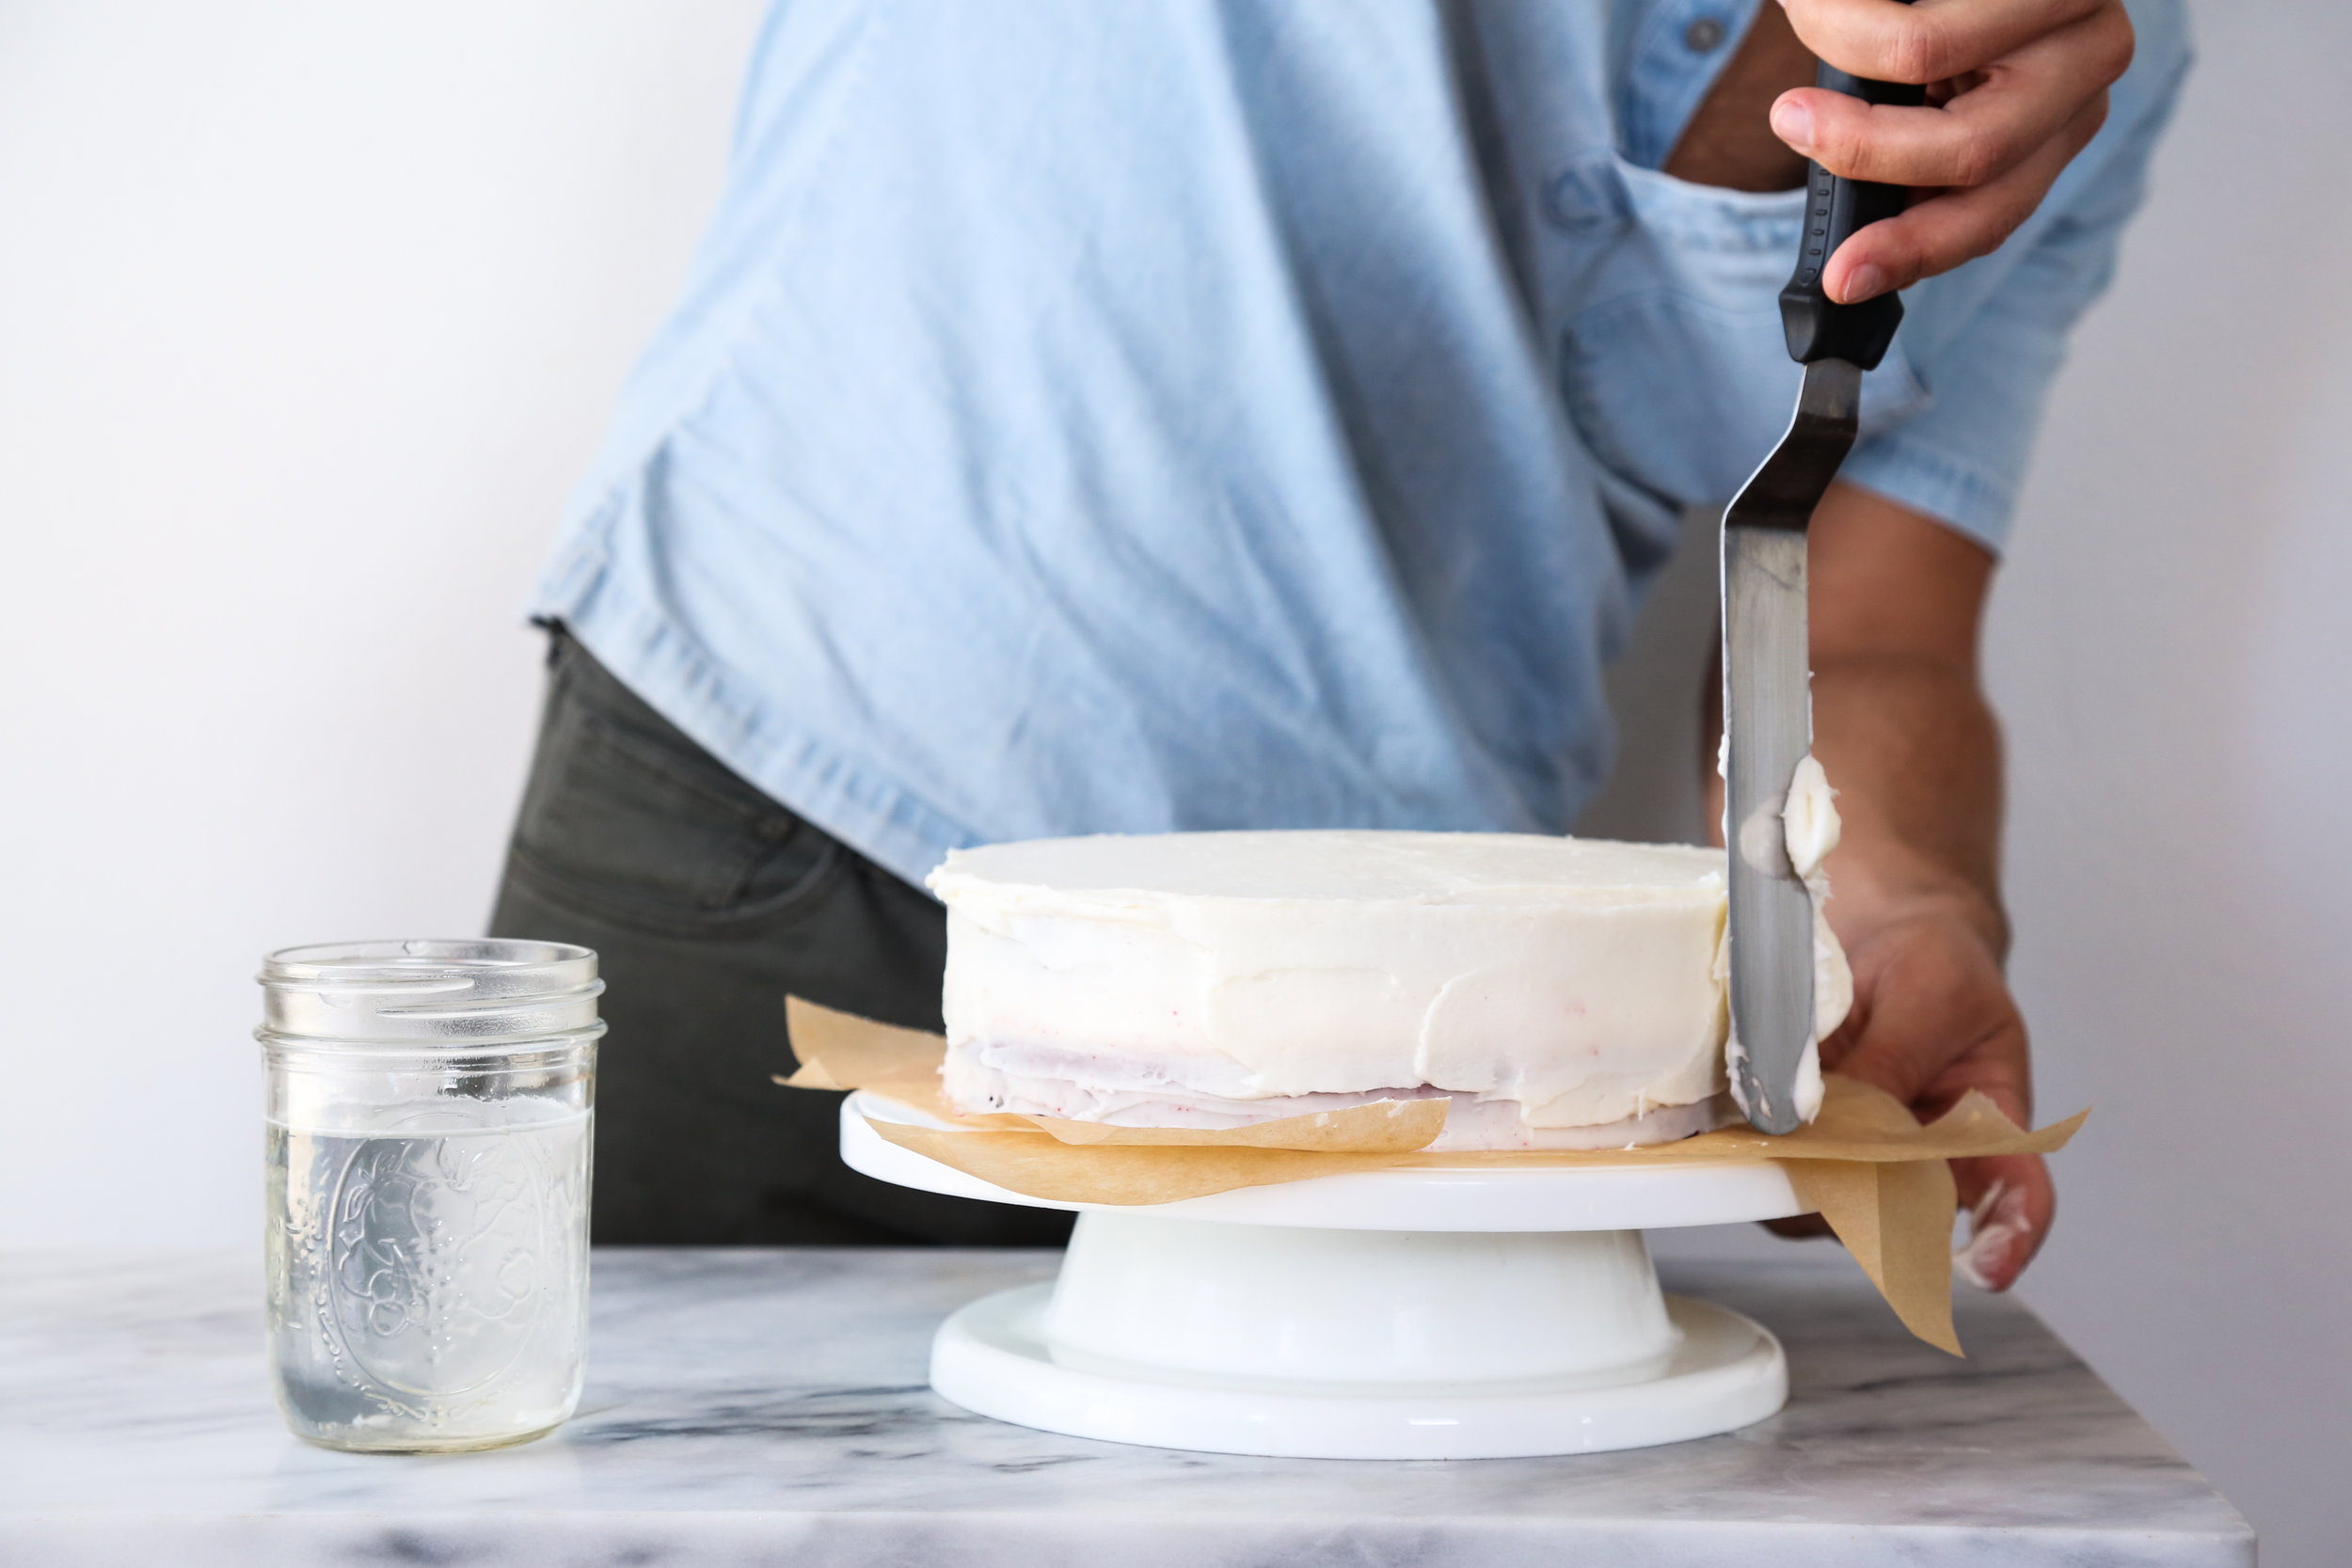
Once you've got your cake pretty much covered, use your hot spatula to go over any little bumps and to smooth out the edges. Look, this takes practice and patience, so don't be hard on yourself if you totes fuck it up.

And, now, yay! Once you're done, slip out the parchment paper and go onto to the fancier decorations, such as swirls and flowers and piping text and all that stuff. I prefer to stick with my old stand-by, covering that cake in caramel sauce or chocolate ganache followed by a bunch of candy or salty snacks!

Salted Caramel Popcorn Layer Cake