Our Walk-In Pantry Plans & How-to!
This walk-in kitchen pantry has been a dream of ours for a long while now and wow wow wow I’m so glad we blocked off a solid two days to knock it out. The room we chose to convert into our kitchen pantry has, for the last 18 months of us owning our home, been our “crap room,” or… should I say… one “crap room” in a Master System of Crap Rooms that have held all of the various overflow things during the wildly large number of renovations we’ve done. But now, with many of our renovations complete and the additional build out of a “little attic” (more on this to come), we could finally turn this crap room into the pantry of our dreams!
It sits right off of the kitchen and is the perfect little spot for storing dry food, dog food, jarred and canned goodies, vases, linens, and our little coffee station. We were on a tight budget for this space, by which I actually mean we had no budget for this space, because we’d overspent on our bunk room project, but we were determined to make it work! We told ourselves $650 was our absolute max, and so here we go!
Prefab cabinets, a gorgeous block of ash wood from a local lumber yard, low-cost wall panelling and a little DIY magic for the shelves made it all come together without giving us too many wallet-induced heart palpitations.
Let’s talk about it!

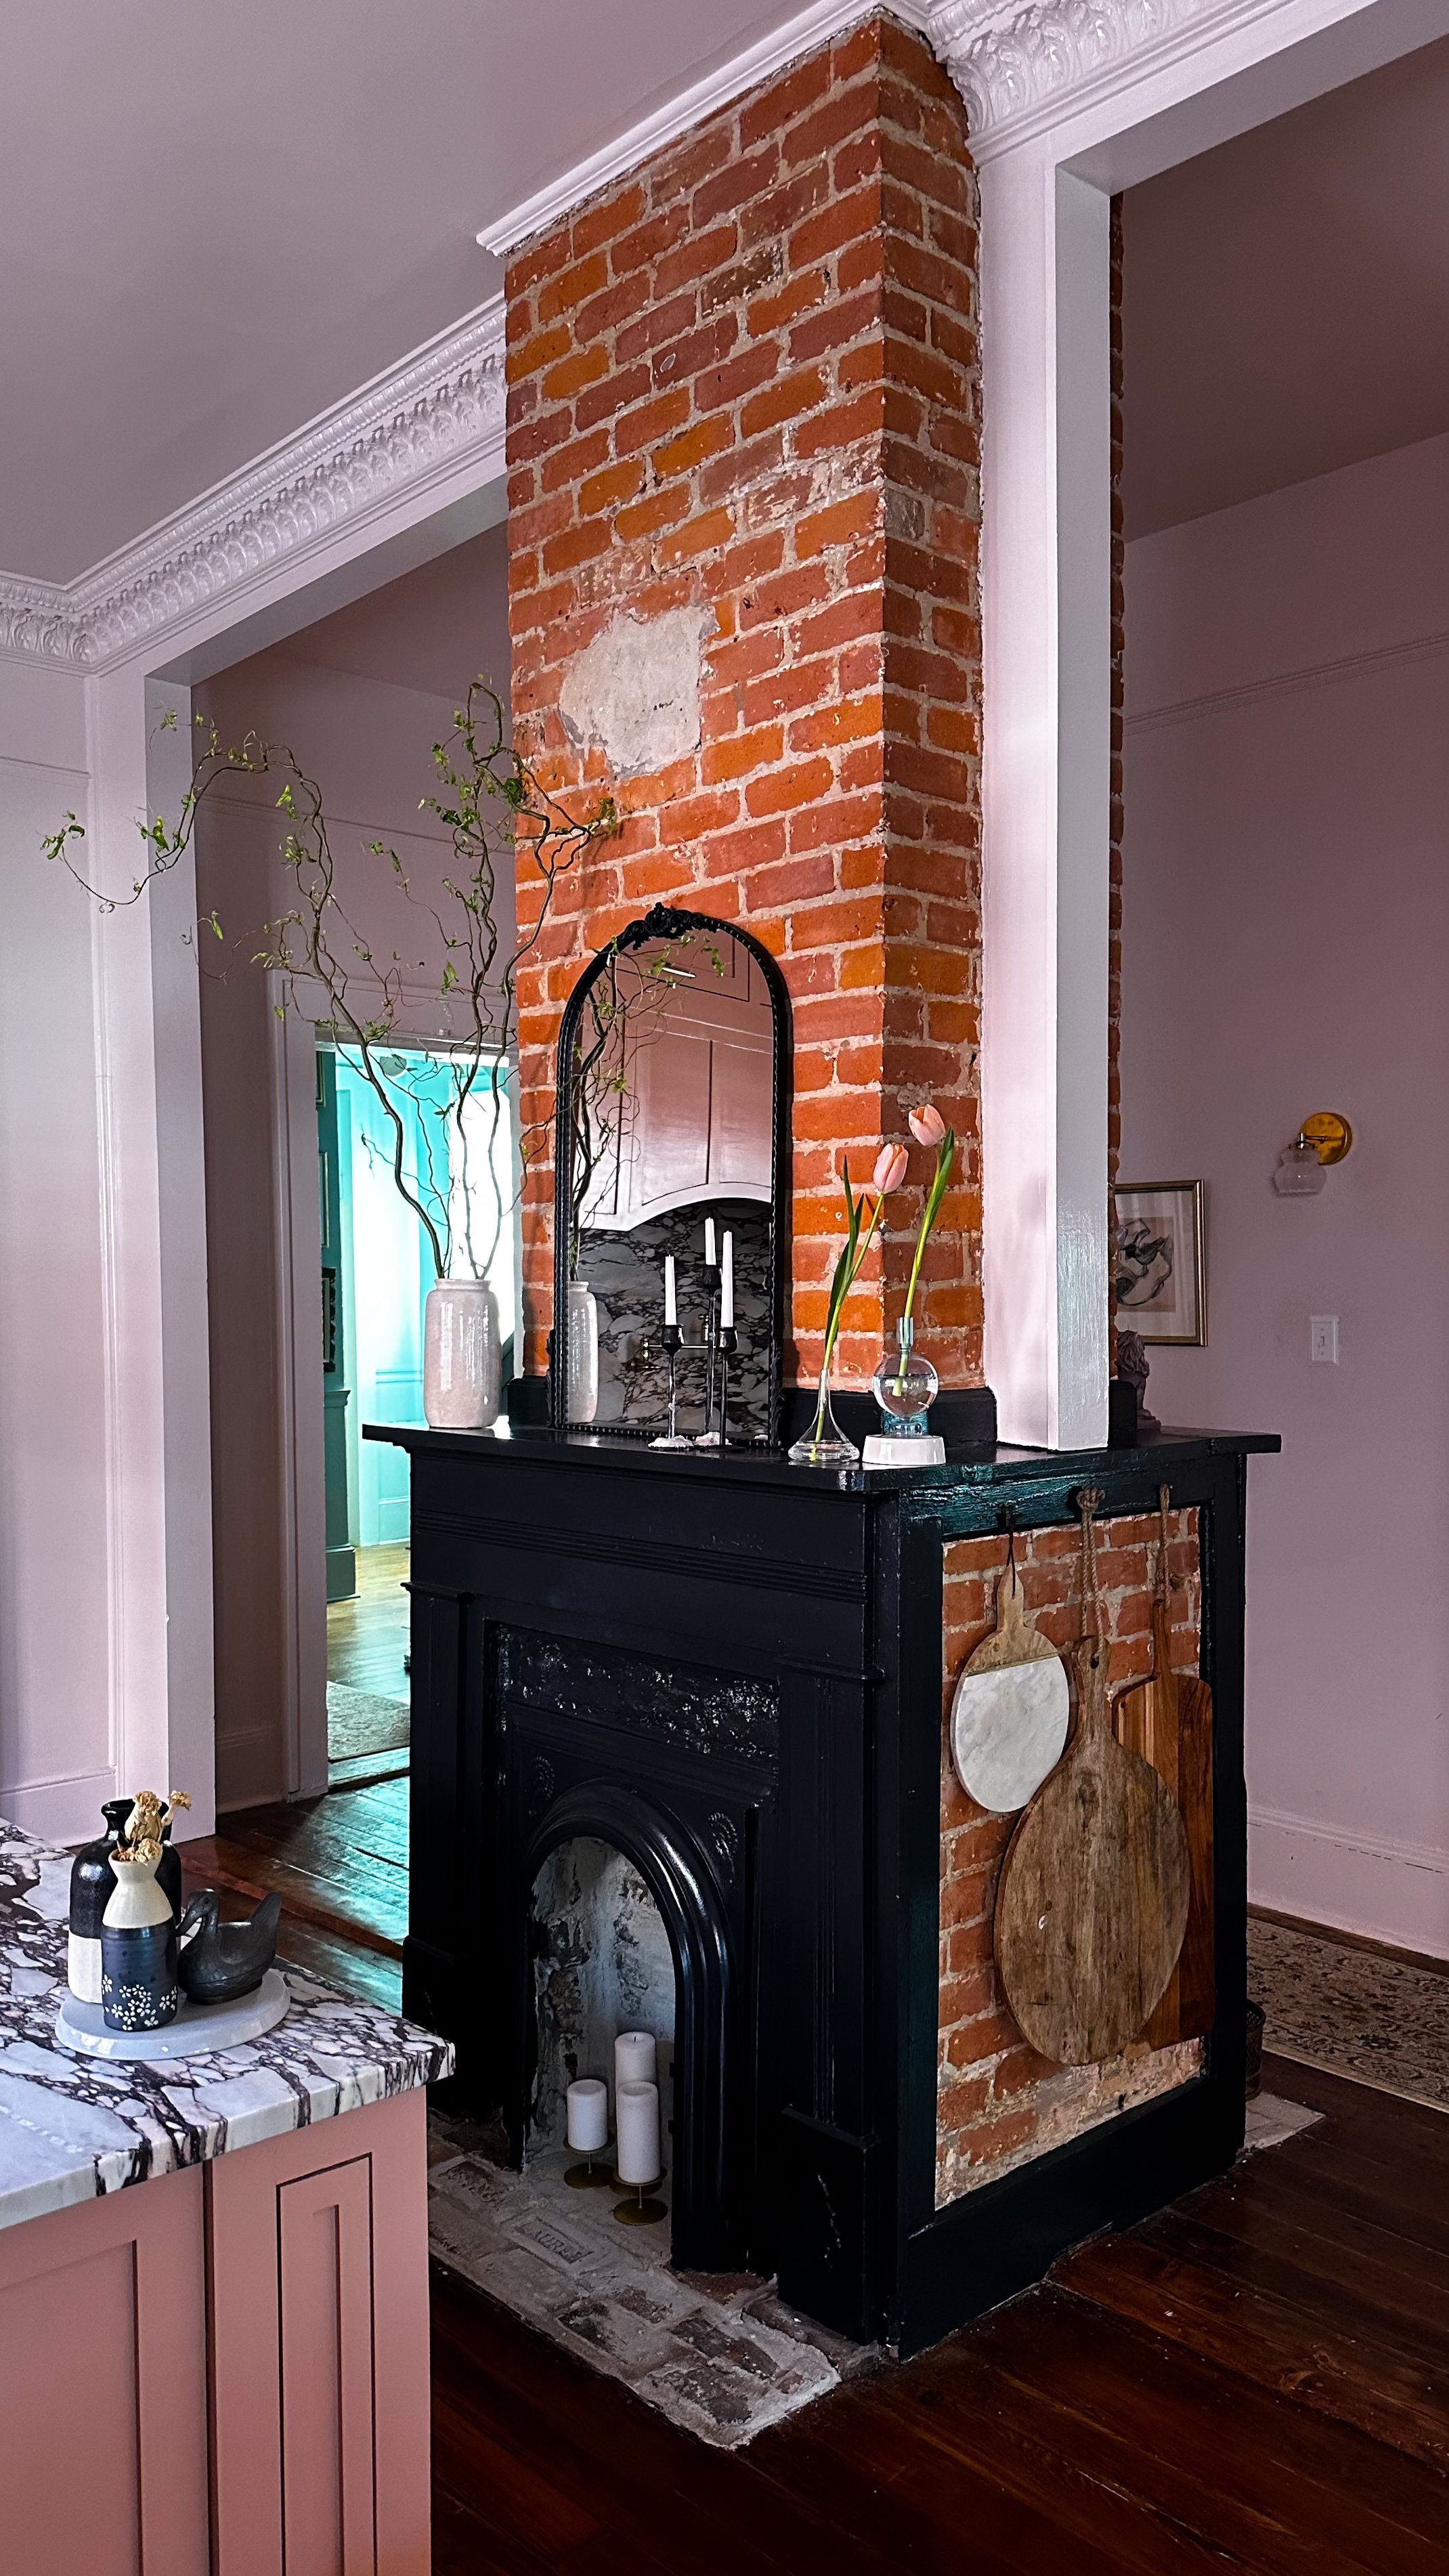
Before lol obviously

Framed!

Painted!
Overview (total cost ~$650)
It’s probably best to give you the quick project flow from start to finish before diving into each step—it’s nice to know where you’re headed when you’re headed there! The very first thing we did to the pantry was add wall paneling—these guys come from Lowe’s in $20 sheets and add charm while also hiding the many irregularities in our old walls. The paneling is capped off with a 4” trim to hide the top seam and add a nice polished look. After that installation, we built a base for our cabinets out of 2x4’s on the floor, running across what would be the front and back of the cabinets. Prefab cabinets were used to keep this budget friendly, and they received a splash of urethane enamel paint to make them look in tip top shape while being resistant to scratches and chips. Ash wood, a hardwood with a gorgeous light, warm tone, was used for the butcher block, while 1x10 oak boards were used to create the shelving. Corbels from Lowe’s were added for additional shelf support and to make it kinda gorg. We break down each of these steps below for you, but overall this project took us just two days to complete. Helpful power tools to have on hand include a power drill, brad nailer, miter saw, and ideally a jig saw or circle saw for cutting the panelling. Heplful other stuff includes Liquid Nails, paintable caulk, primer, paint, and patience ;).
Wall Panelling
The panels we used in this room are the same MDF beadboard panels we used in our Garden Apartment kitchen. It’s a super quick and cost-effective way to spice up a wall. It’s made of MDF so not super ideal for areas that will get regular moisture exposure, like a steamy bathroom, which will cause it to warp, but primer and paint seal it enough for use in an area like a kitchen pantry, such as this one. The panels we buy come in 4’ x 8’ sheets, which makes them a bit unwieldy but they are super lightweight. Measure your wall space to determine how many sheets you need to buy, cut them to the appropriate width (we used a circle saw for this, but a table saw would be the most ideal. We don’t have one!), and install by just smearing on Liquid Nails to the back of the panels, placing on the wall, and using your brad nailer to secure it, making sure the nails are hitting studs inside the walls. We did a small circle of the Liquid Nails every 2’ or so across the back, and then did brad nails every 2’ along the edges and corners, as well as in a square formation around the center. (We do not have to aim for studs in our case, because our old walls are made of solid barge board.) Once it’s all installed use paintable caulk to seal all the little holes and seams! After the caulk dries you can paint. The paneling comes primed, which is nice, and we then painted it with Sherwin-Williams Intimate White SW 6322 in Emerald Designer Edition, which you may recognize from our front sitting room.

Imperfections, joints, etc, all get caulked!

After caulking and painting.
Base Cabinets
We used prefab cabinets (click for the center piece / click for the left/right side pieces) from Lowe’s for this project to keep costs down, and surprisingly enough we’ve gotten quite a few dm’s asking which custom cabinet company we used! So, we’re happy with how they came out. Before we installed the cabinets, we cut 2x4’s into a rectangle the same shape as the cabinets, to act as the base and provide extra height (remember, you want kitchen counters to be around 36” and most cabinets are sold at 30” to allow for a base or legs and also countertop). The first 2x4 was screwed into the wall, two perpendicular pieces were were screwed into that piece on either end and two more perpendicular pieces were added in the two spots where the center cabinet would meet the right and left side cabinets, and then the 2x4 that would run across the front of the cabinets was screwed into those four perpendicular pieces. With our base in place we painted the cabinets Sherwin-Williams Roycroft Rose SW 0034 in Urethane Trim Enamel and installed them into the back wall and the base 2x4’s using the install hardware that came with the cabinets––pretty simple stuff! The cabinet hardware is also from Lowe’s, just classic and simple brass round cabinet knobs.
Countertop
We knew we wanted a butcher block countertop in here. We plan to do stone for the countertops in the main kitchen renovation, and wanted this to feel separate and more of a work space, and we loved how our DIY butcherblock counters came out in the Garden Apartment. We went to a local lumber yard and found a single piece of Ash wood that was the exact depth we needed (12”) and had the guy there cut it to length. It was about $170 and looked gorgeous. We did multiple coats of Howard’s Cutting Board Oil before installing it on top of the cabinetry. You’ll want to screw it in from underneath the cabinetry and then boom you’re done.

Picking out the perfect piece!

The difference in color between bare (top) and seasoned & conditioned (bottom).
Shelving
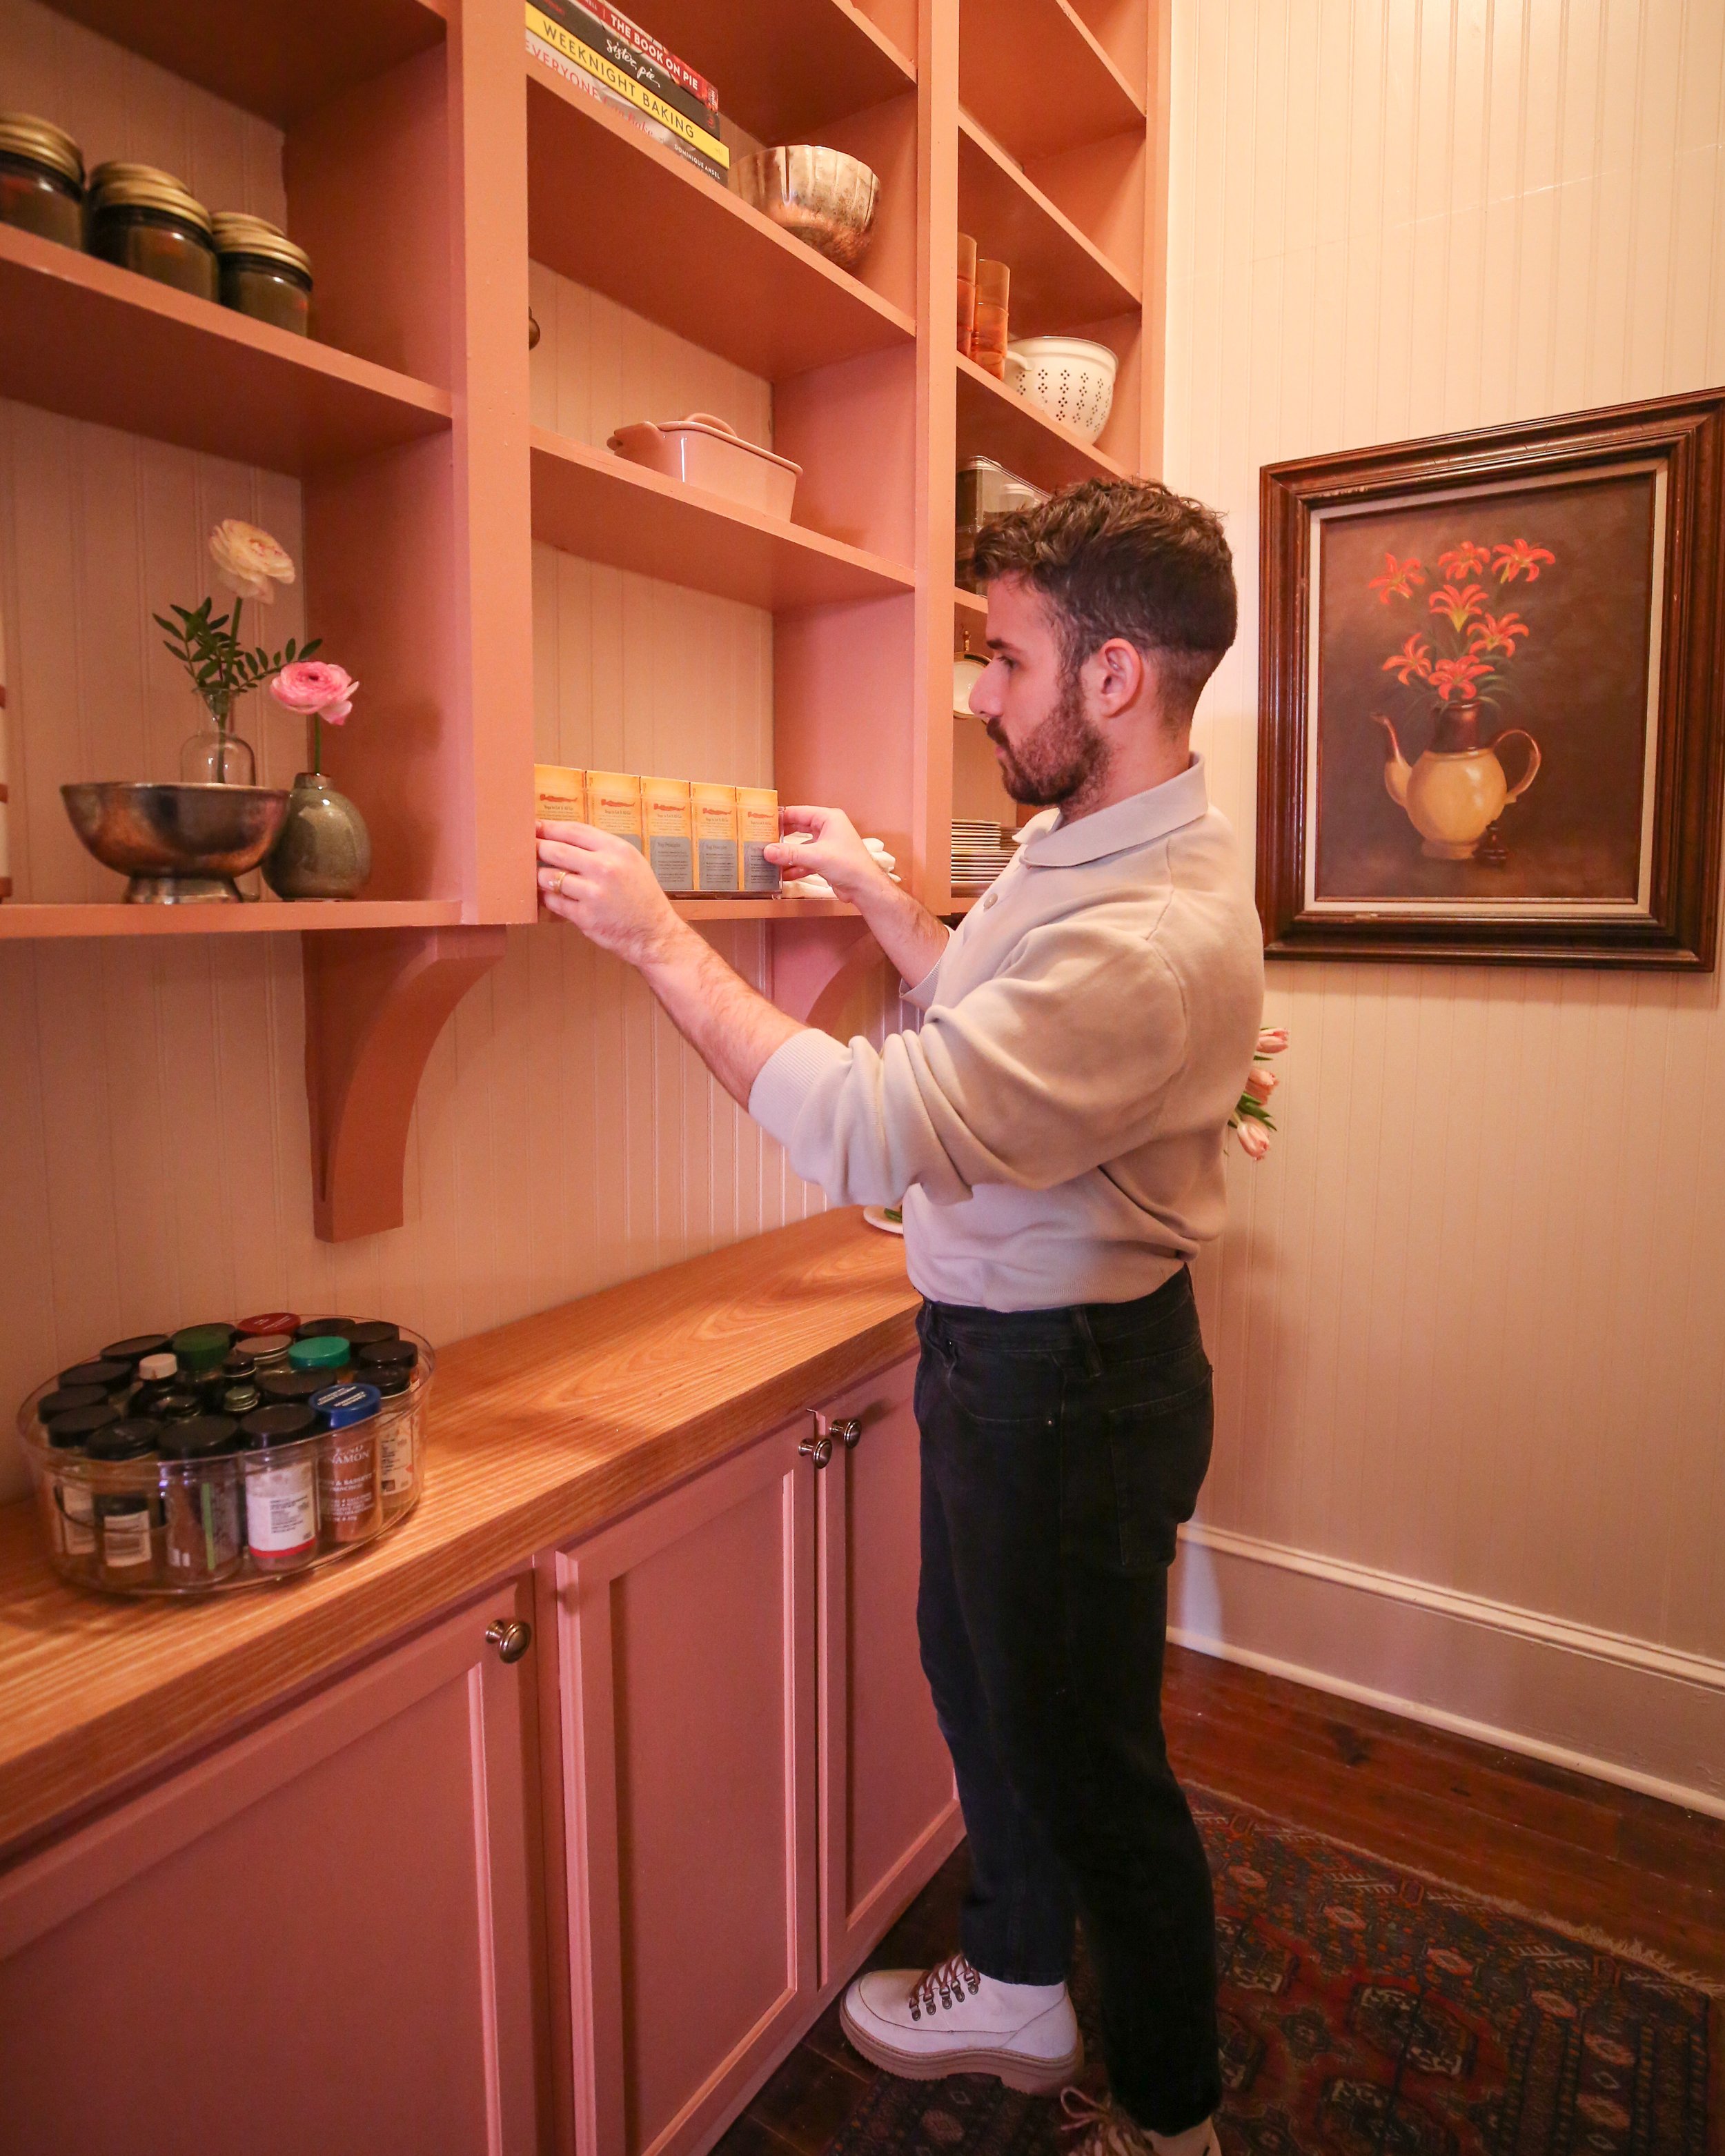
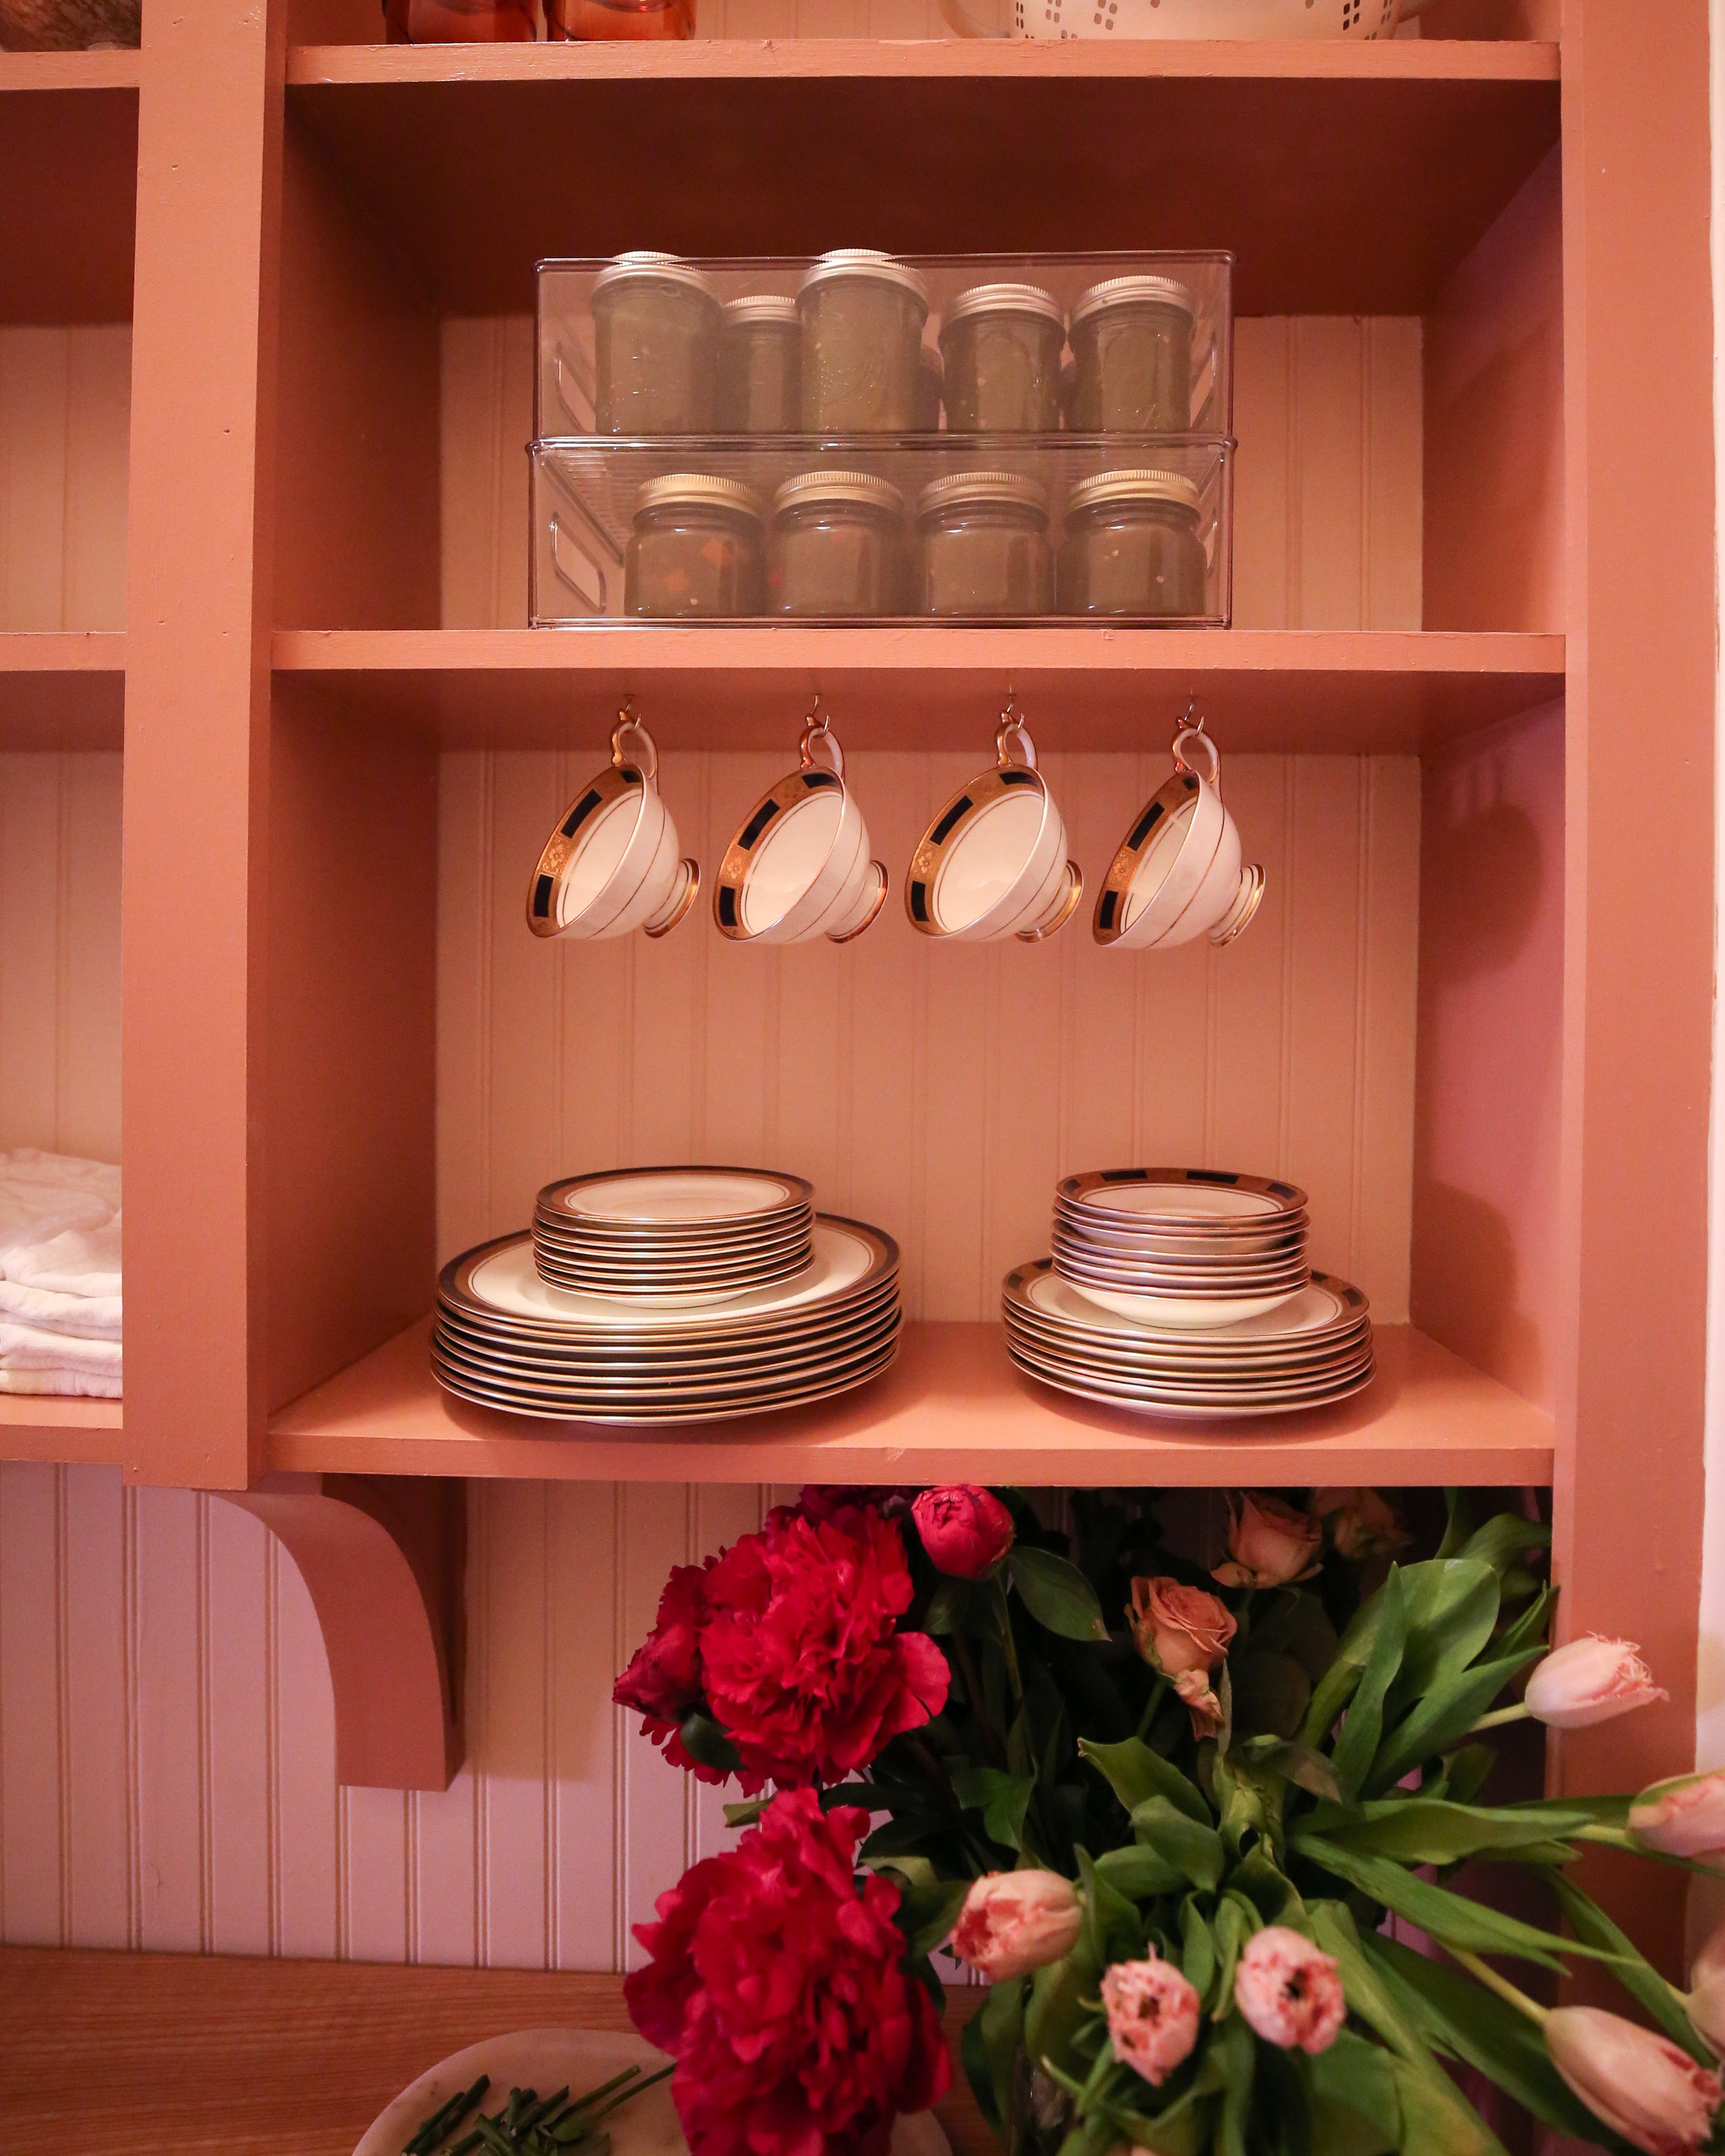
First, let’s talk configuration. It took us forever to figure out how we wanted to configure the shelves. We knew we wanted three columns of shelving—three is always a visually pleasing number in home design and it also made sense for the size of our pantry—but figuring out the vertical space between the shelves was another story. We settled on 15” between the first and second shelf, and 11” between the remaining four shelves. The very top is about 36” from the ceiling and can be used for anything super tall like large vases. We’re happy with this configuration and love that the 3 columns of 5 shelves gives us a total of 15 “cubbies,” which makes staying organized pretty easy.
We used 1x10 select pine boards for both the shelves and the "vertical” columns between them. The columns are made of two 1x10 pieces, screwed together to create a 1.5” thick column. We first installed the sides and top of the shelving unit, screwing the sides into the side walls and the top into those pieces of wood. We used corbels from Lowes for extra support along the bottom, installing those into the back wall before we started with the horizontal shelving. The first horizontal shelf gets screwed into the corbels and into the vertical boards flanking both sides.
And here’s where it gets technically difficult to explain. So take a look at figure 1 while I explain this to you. The vertical boards that create our “columns” are actually short boards, cut to size between each horizontal board. We did this so that the horizontal boards would have a place to be screwed into that wouldn’t be visible (the top edge of the vertical board). The edges of the vertical boards then got a flat 1x2 trim to cap the seam and to give it as more finished appearance.
Once the construction was done, we caulked all of the screw holes and primed and painted the whole thing Roycroft Rose.

The very first step was to add the corbels and frame the sides, top and bottom.

Figure 1
And that was pretty much it! Depending on your DIY level this either looks super manageable or incredibly confusing and difficult, but I think we’d go ahead and mark this difficulty level as “moderate.” It did take a bit of planning and two days of work, but there’s nothing technically super hard—no weird cuts to make and no fancy or hard to find products. Just simple, somewhat repetitive tasks that come together to make this space work.
We hope you give this (or some iteration of it) a try, and if so let us know! You can find more DIY projects below and in our book Housewarming.
xoxo
Beau & Matt